Important Note
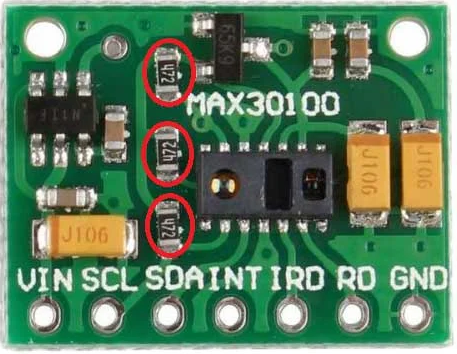
If you are using the MAX30100 sensor with resistors, make sure to remove them before connecting to the Arduino. This ensures that the sensor operates correctly.
This tutorial will guide you through building a pulse oximeter using the Arduino Nano and the MAX30100 sensor. The project will enable you to monitor heart rate and blood oxygen saturation (SpO₂) levels, displaying the readings on a local webpage.
If you are using the MAX30100 sensor with resistors, make sure to remove them before connecting to the Arduino. This ensures that the sensor operates correctly.
The necessary drivers needed for the SpO2 readings webpage to work can be installed simultaneously and automatically with the successful installation of the official Arduino IDE.
When you connect your Arduino to your computer, it should show up as a COM port (like COM3 on Windows) or /dev/ttyUSB0 (on Linux). Here’s how to ensure you’re selecting the right port:
ls /dev/tty*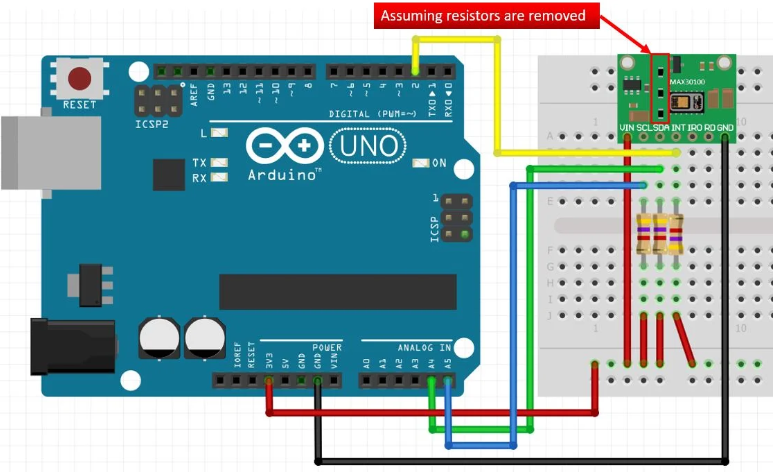
On the webpage, click the "Connect to Pulse Oximeter" button. This will open a dialog to select the appropriate COM port for your Arduino. Once connected, the heart rate and SpO₂ readings will be displayed in real-time.
This project is a great way to learn about sensors, microcontrollers, and web development. You can expand this project by adding more features like data logging or visualizing trends over time. You can now visit the real-time readings page by clicking the button below.